Introduction
I received many requests to continue my first blog demonstrating the BGP routing between the Libreswan and OCI. In my previous blog, I created an IPSec VPN connection to Libreswan using BGP to exchange prefixes, and in this blog, I will show you the steps for receiving and sending the prefixes between peers.
Below is the link to my first blog, “Creating an IPSec connection to OCI using Libreswan as a CPE” please check this out.
Creating an IPSec connection to OCI using Libreswan as a CPE (ateam-oracle.com)
Prerequisites
1. Basic knowledge of networking routing protocols (BGP)
2. Basic knowledge of Access-list and Route-Map concepts
Agenda
1. BGP Routing Advertise
2. Test Connectivity
3. Conclusion
BGP Routing Advertise
For allowing the route advertising between the Libreswan and OCI, we already established the BGP session between them (Refer to my first Blog mentioned above). Now, it’s time to configure some extra lines to confirm the route advertising between our peers.
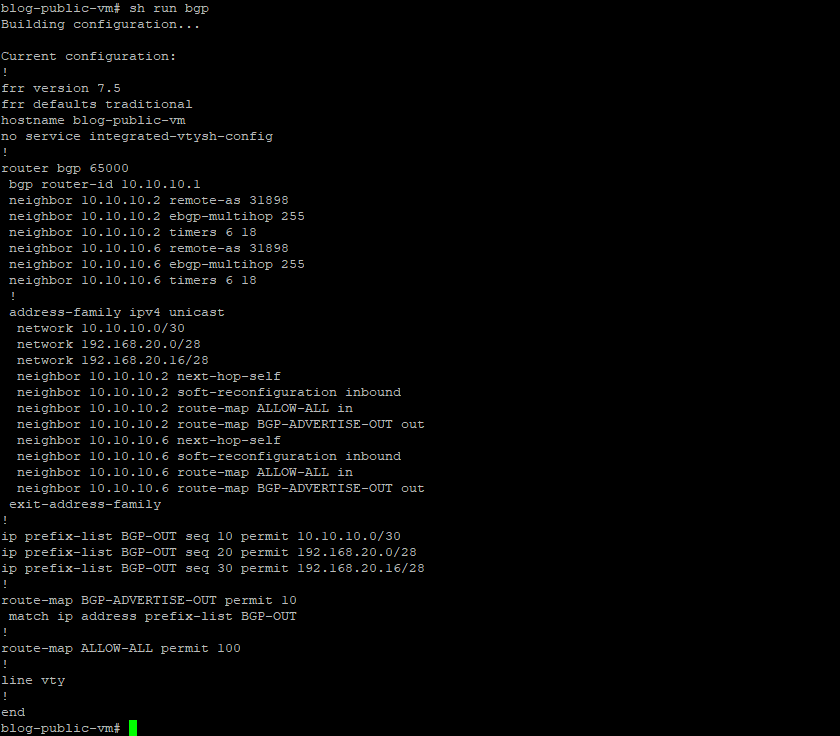
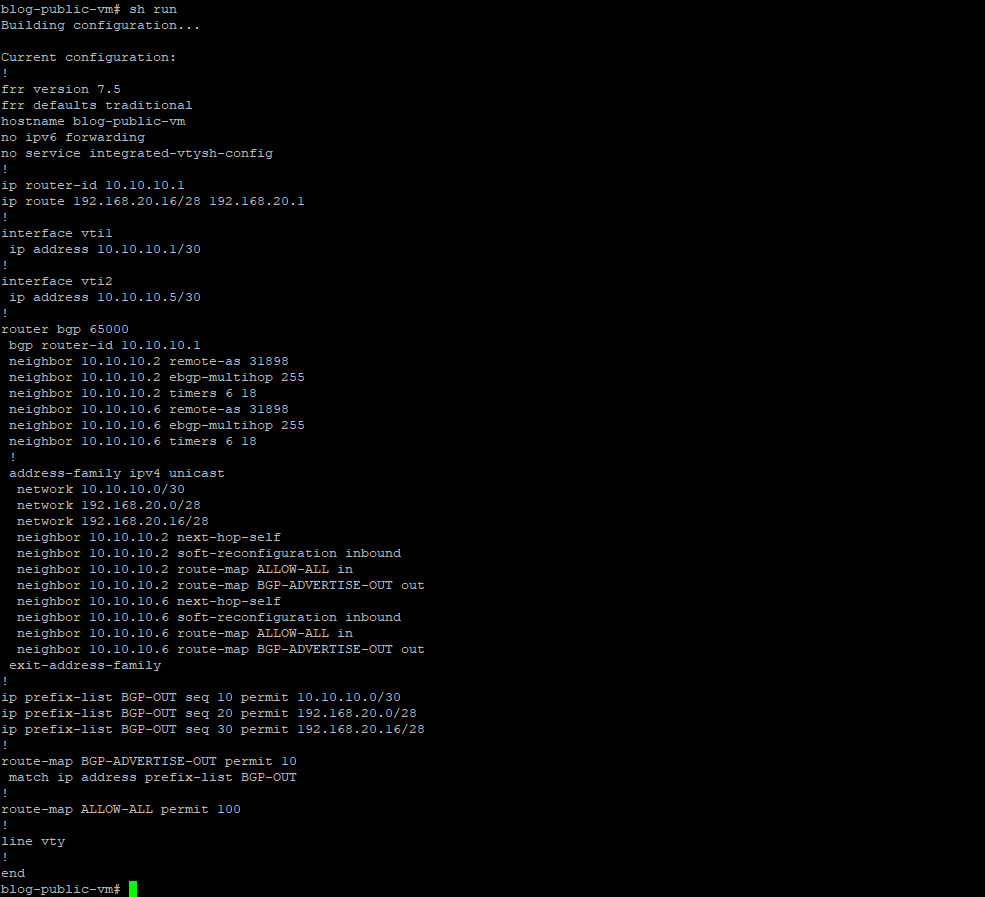
First, we must create a prefix-list permitting tunnel, Blog-VCN (VCN hosting Libreswan Instance) private and public subnets to OCI.
Note: For configuring the Prefix-list we need to run vtysh command in the Libreswan VM and then get into the Global config mode (From privileged EXEC mode, enter the configure command).

The Prefix-list (BGP-OUT) is then referenced in a Route-Map BGP-ADVERTISE-OUT.

Note: Route-map ALLOW-ALL is added to allow all other routes through.
The route maps are then appended to the neighbor statements.
Below is what we have so far.
Note: Private subnet 192.168.20.16/28 added as a network statement under BGP address-family to test the connectivity between the private VM behind the Libreswan (Libreswan created in the public subnet) and private VM in OCI (San Jose region).
Now, let’s check the BGP neighbors’ status.
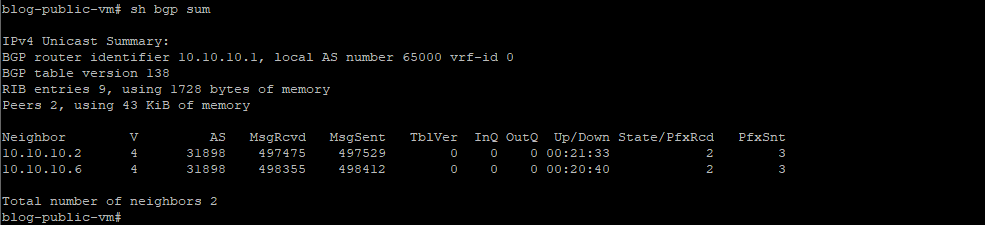
As you see above, we are sending and receiving the prefixes.
Now, let’s confirm the BGP route advertising from the OCI dashboard.
Login to the OCI dashboard and choose US West (San Jose) region where we have our IPSec setup.
Navigate to Networking from the left menu From the Customer, Connectivity list, click on Site-to-Site VPN
Click on VPN-IPSec-to-Libreswan and check the tunnels connections.
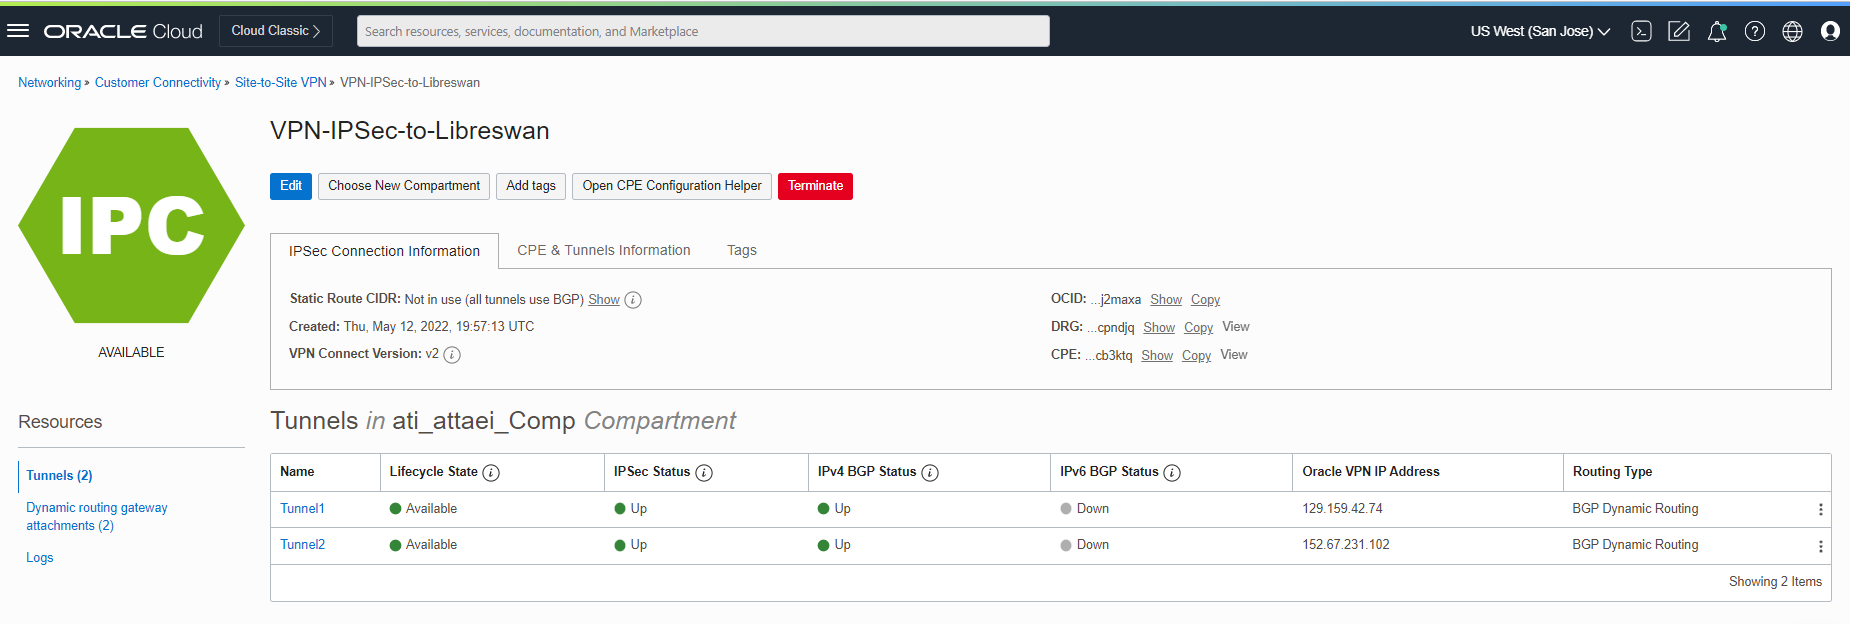
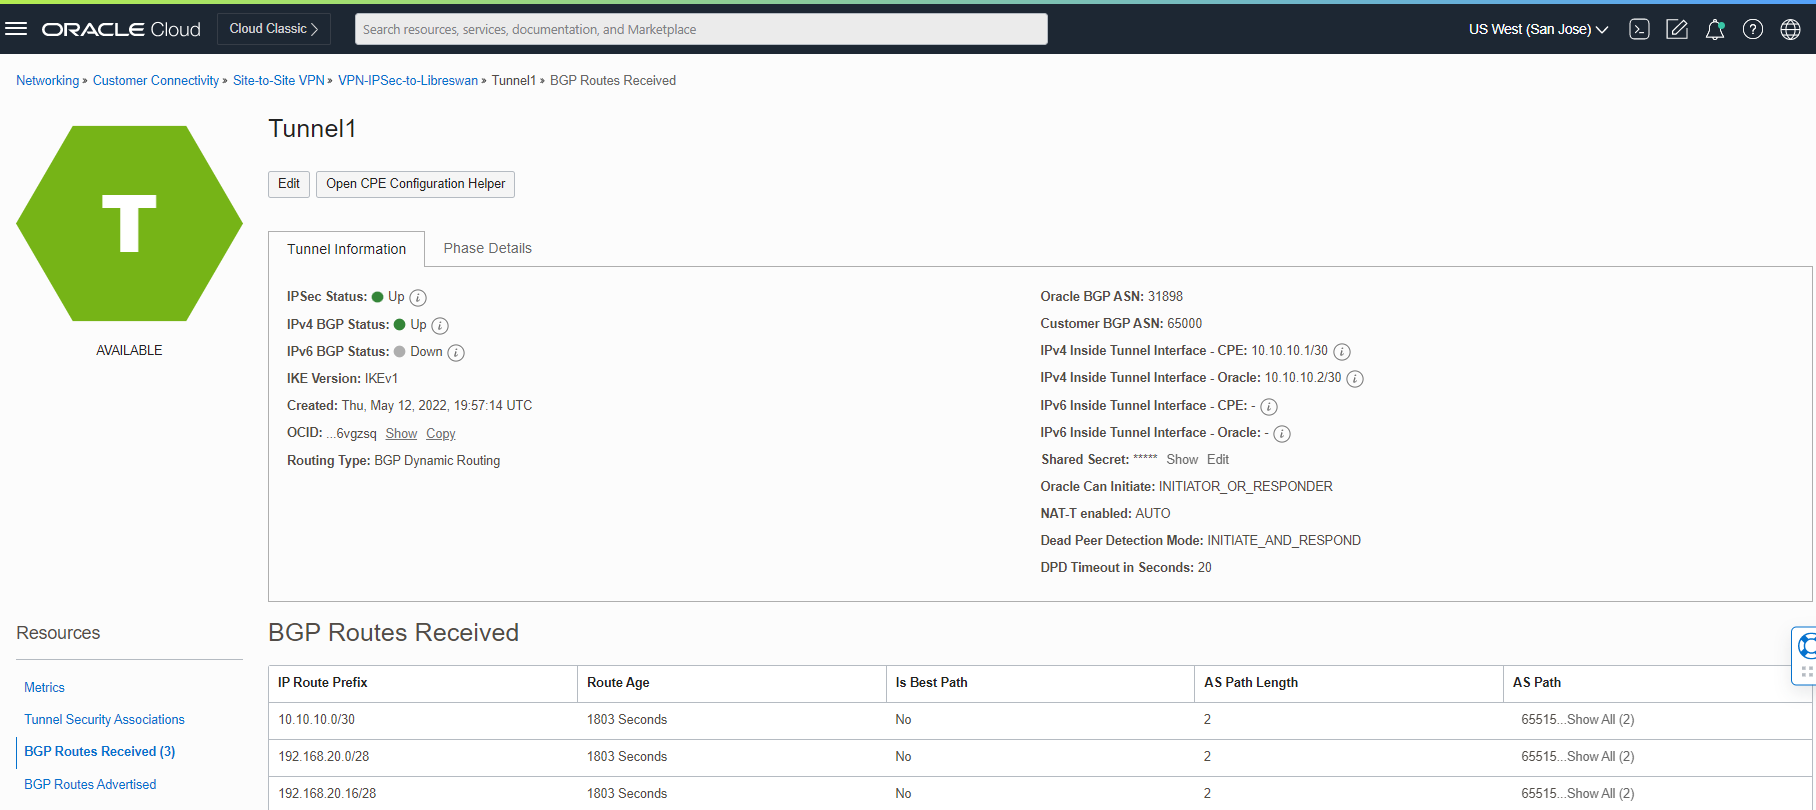
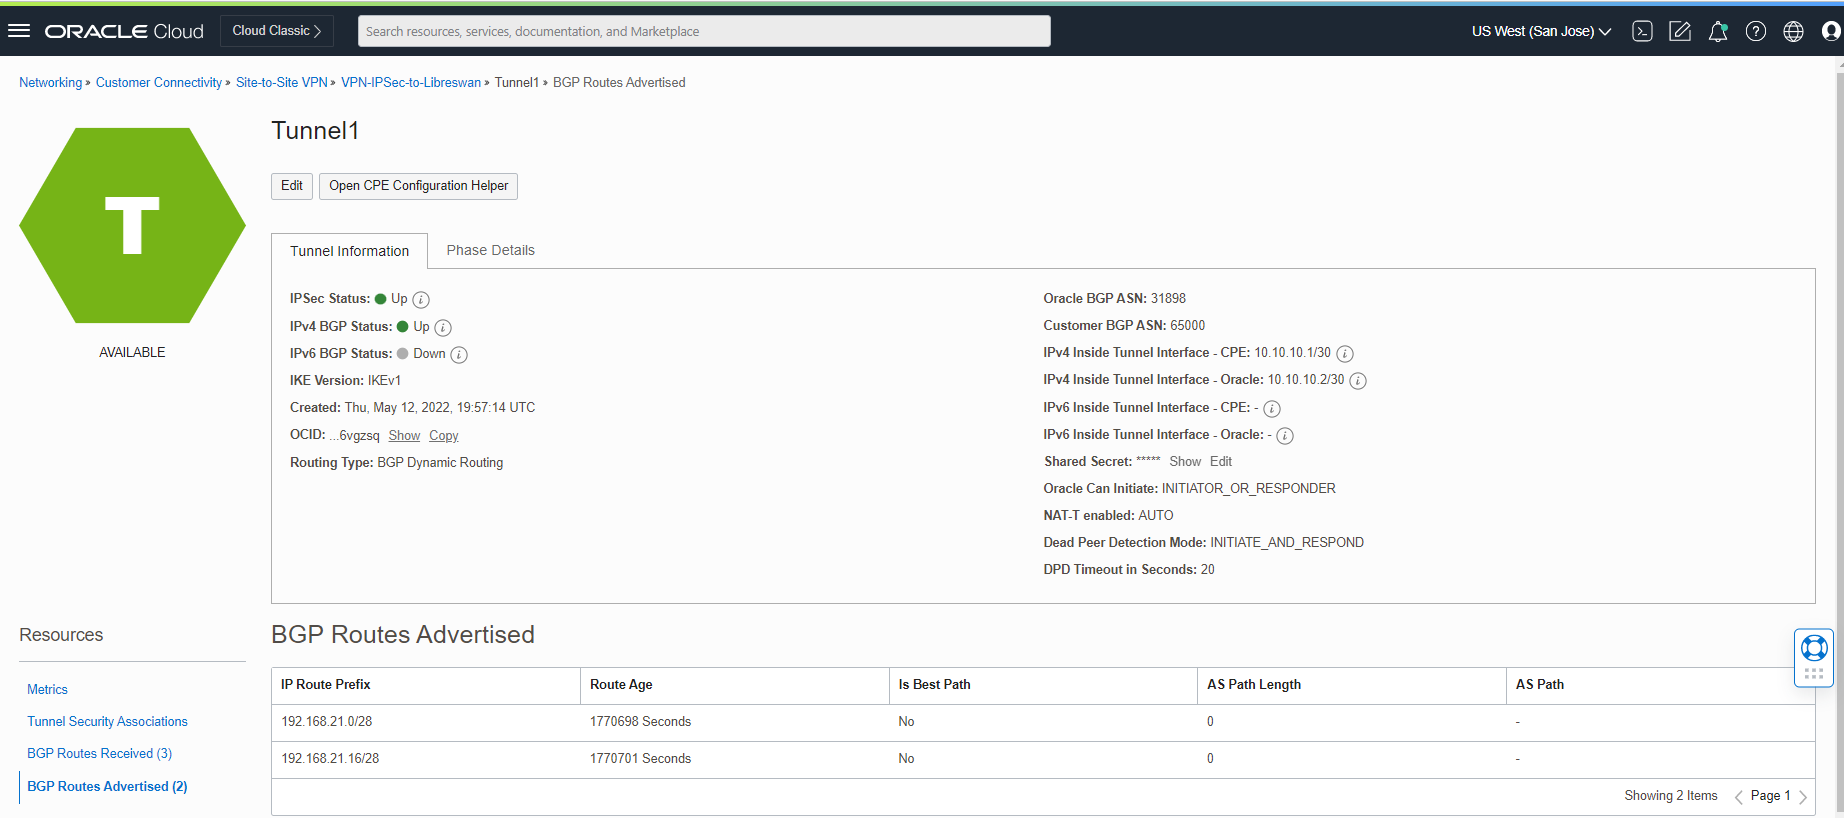
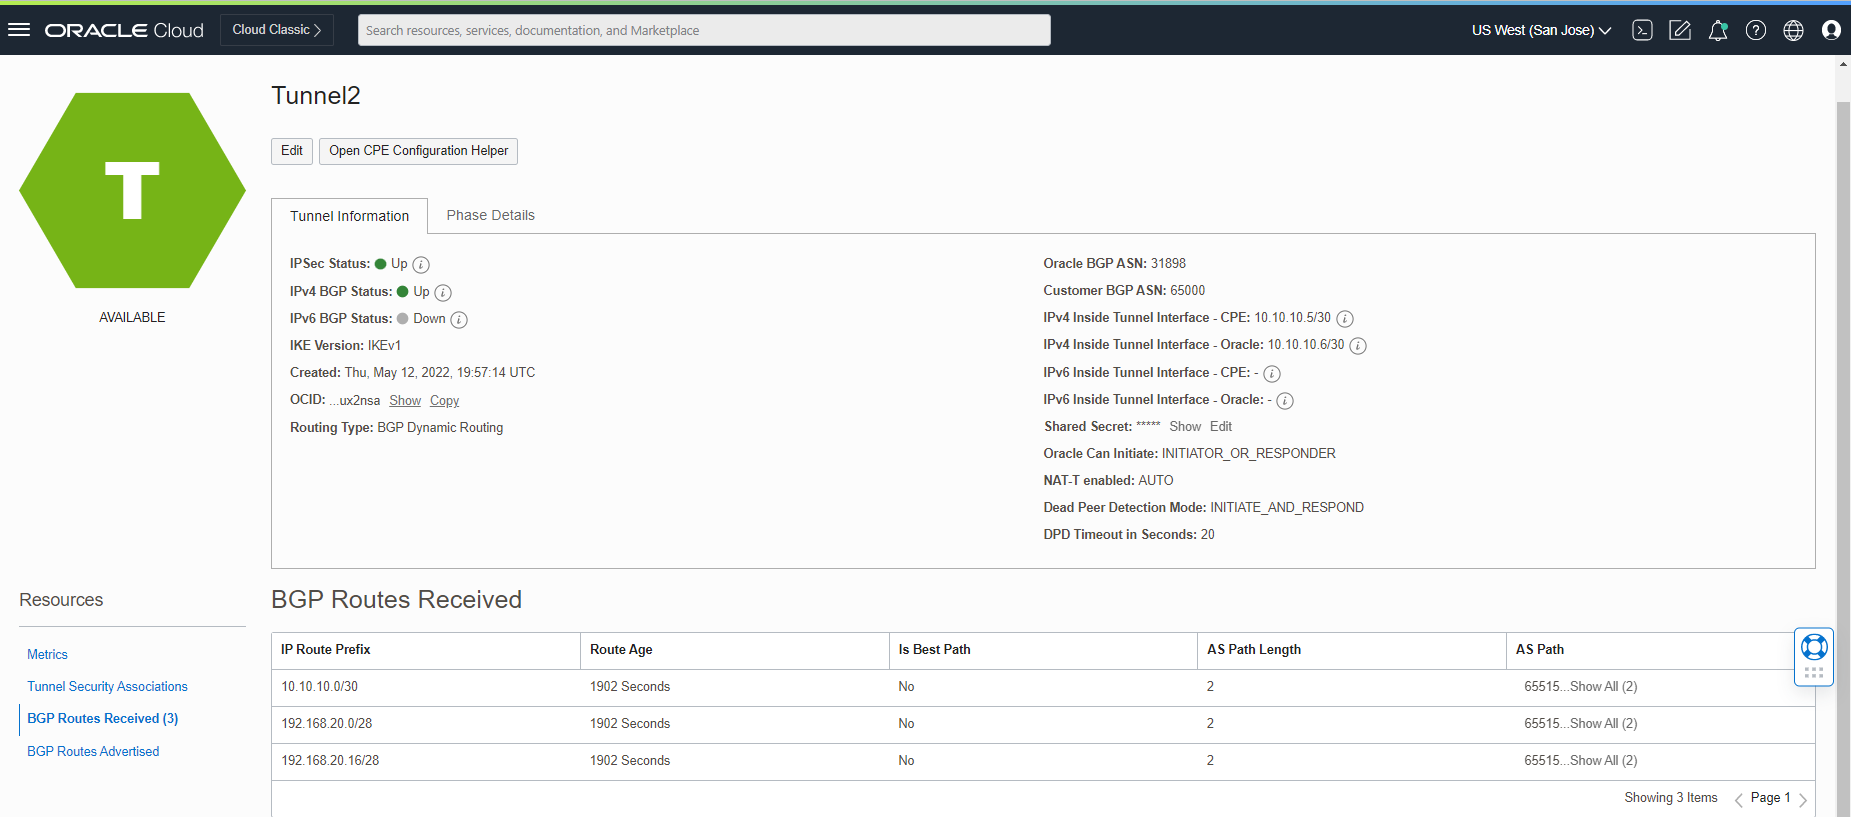

As you see above, we are sending and receiving the routes between the Libreswan and OCI.
2. Test Connectivity
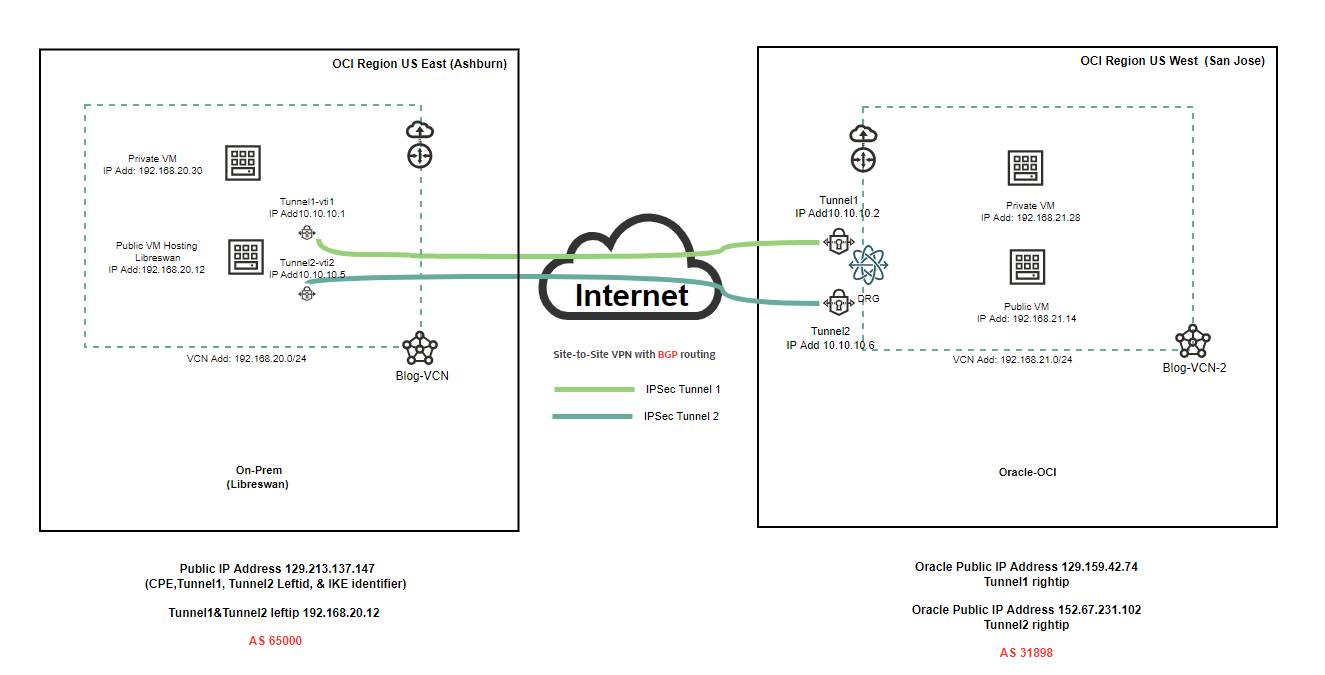
Now, it’s time to test the connectivity between the private VMs behind the Libreswan and the OCI (San Jose) region. Please check the diagram below.
Before we start to test, I need to share with you a couple of screenshots from Libreswan (Public VM) and the OCI dashboard.
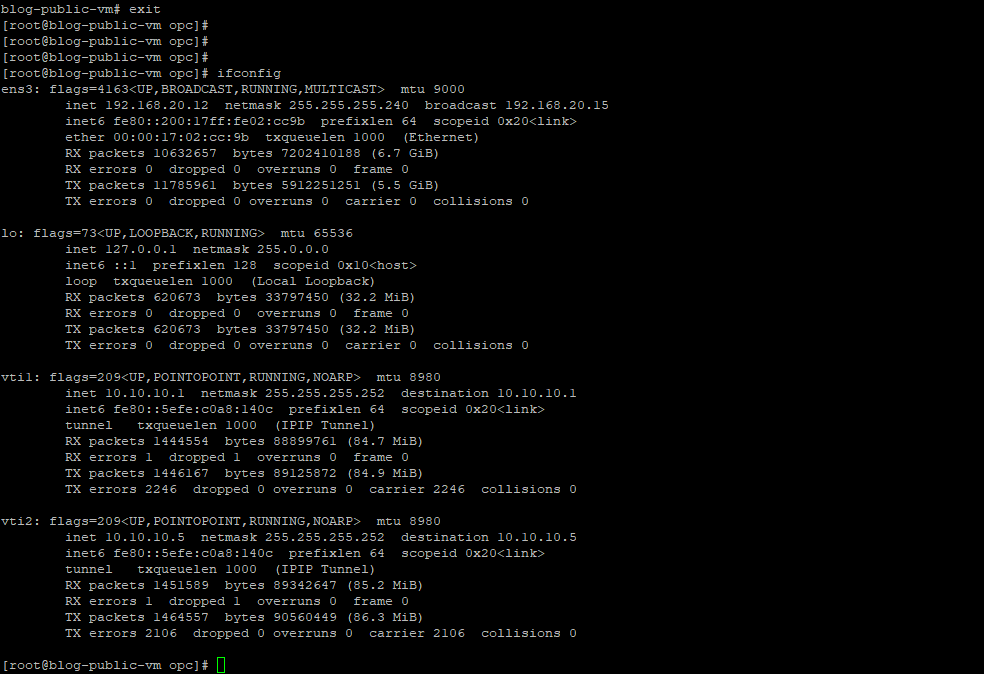
Here is the status of Libreswan public VM, loopback, vti1, and vti2 IP addresses.
For testing purposes, let’s create a private VM on both sides. I created a Private VM machine in the Ashburn region from the private subnet range 192.168.20.16/28 (Same VCN as Libreswan hosting my private VM.)
For connecting to that private VM, we need first to create a key file (in my case, I called it ati.key) and then SSH from Libreswan Public VM to that private VM.
Please check my Subnet blog for more information regarding Private VM creation and access. Here is the link
Note: Please repeat the same steps above for Private VM on the OCI side.
After private VMs creation in Libreswan and OCI, I added a Private VM subnet as a static route to my Libreswan. Here is what we have now. “IP route 192.168.20.16/28 192.168.20.1 ” added to my Libreswan.
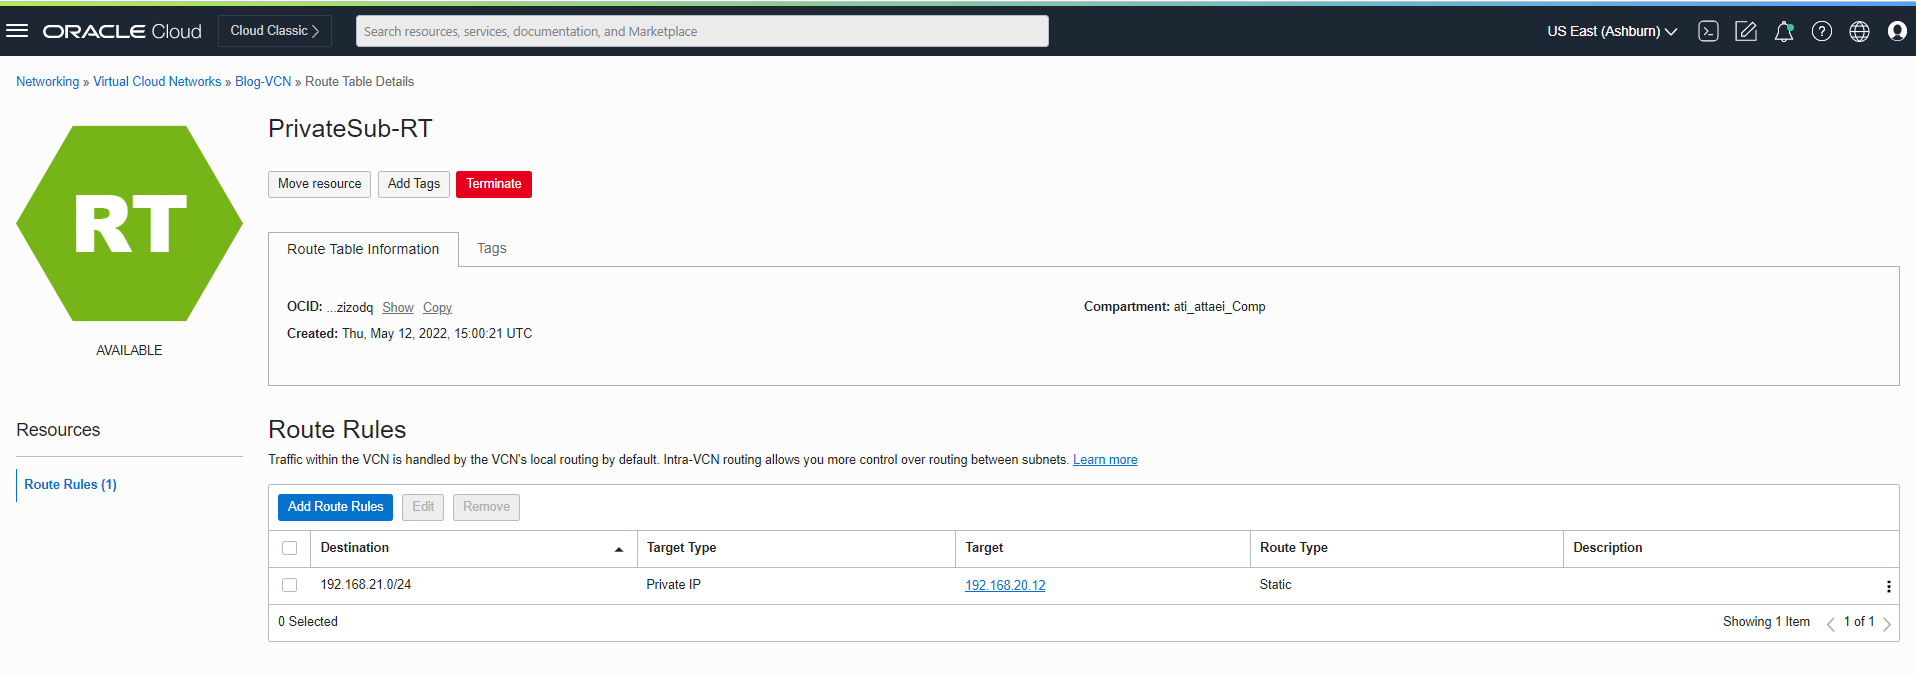
On the OCI side, static route target type Private IP 192.168.20.12 is added. See below
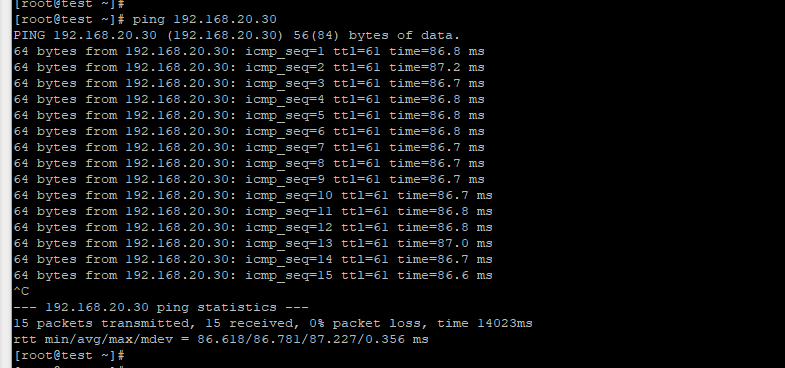
Let’s connect to the private VM and test the connection to the OCI private VM.
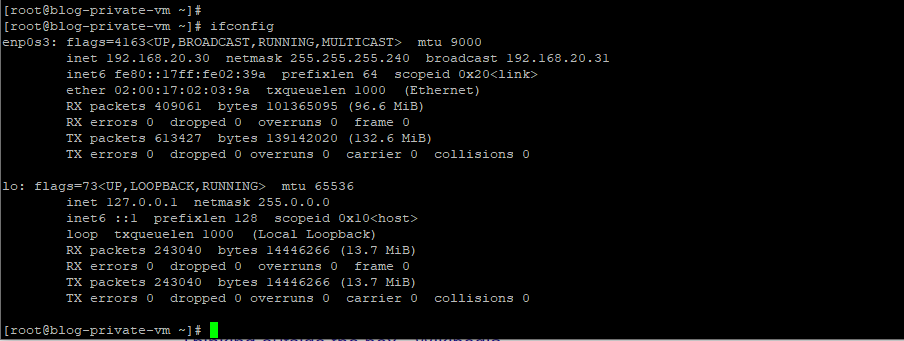
Note: Ashburn (Libreswan) region Private VM IP address is 192.168.20.30
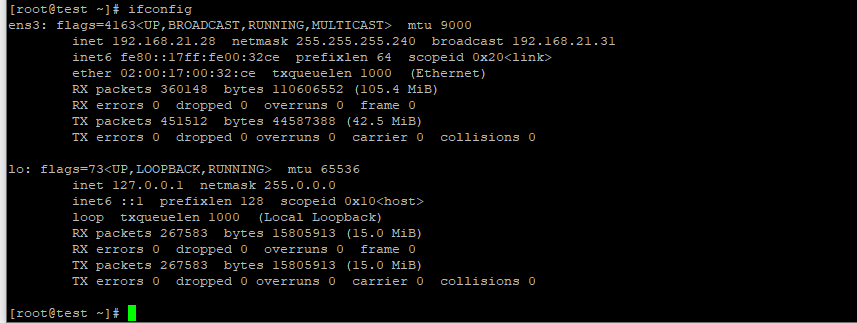
Note: San Jose (OCI) region Private VM IP address is 192.168.21.28
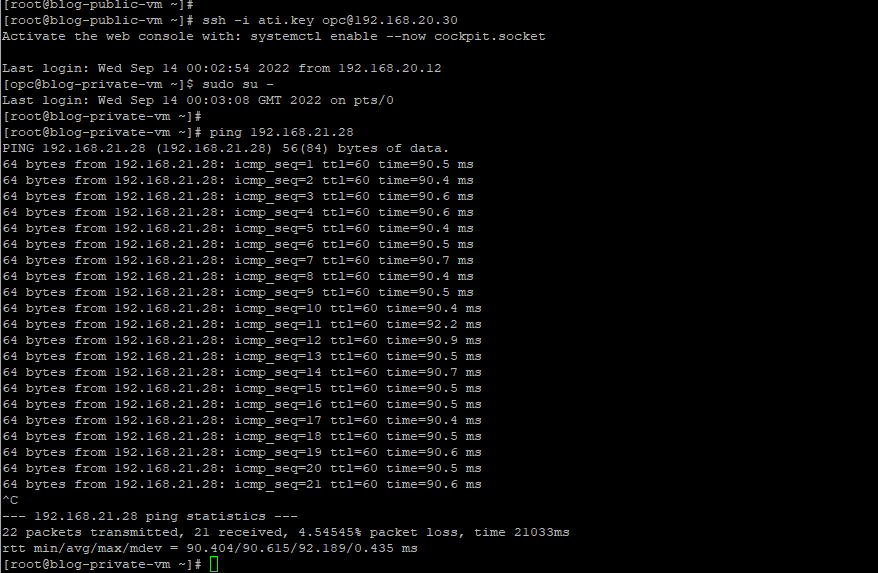
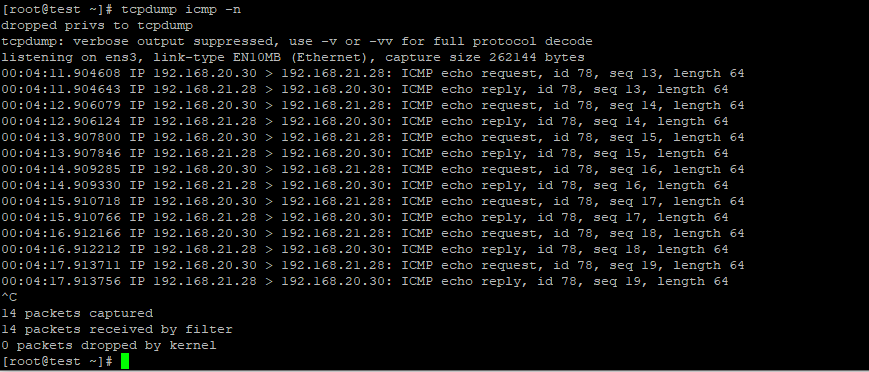
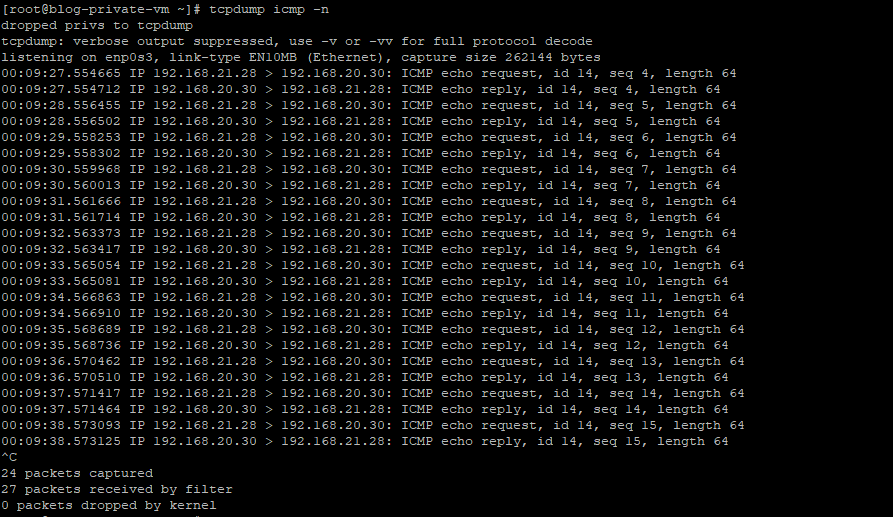
As you see above, we can ping the private VM in OCI from the private VM behind the Libreswan. While pinging that, I also captured the tcpdump result from the OCI private VM.
Here are the private VMs in OCI and Libreswan interface status.
I also did the ping test above from the OCI private VM to the Libreswan private VM.
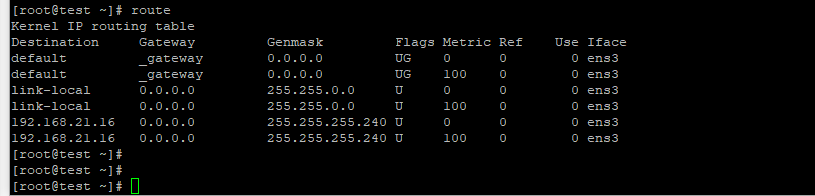
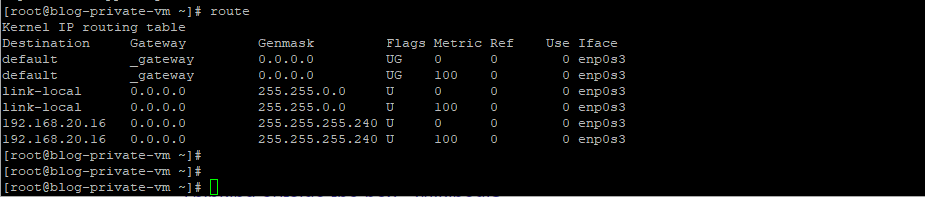
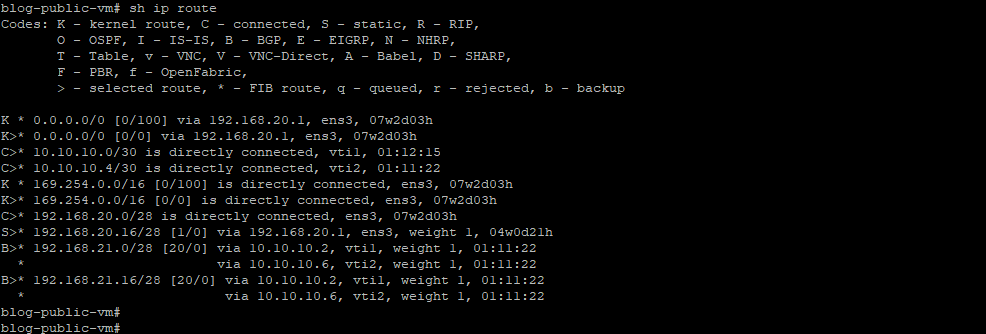
Routes status in Private VMs.
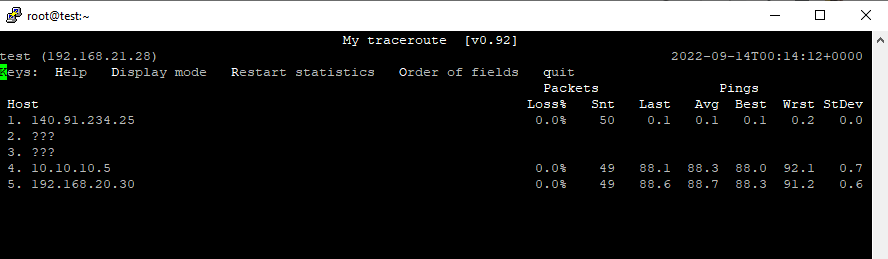
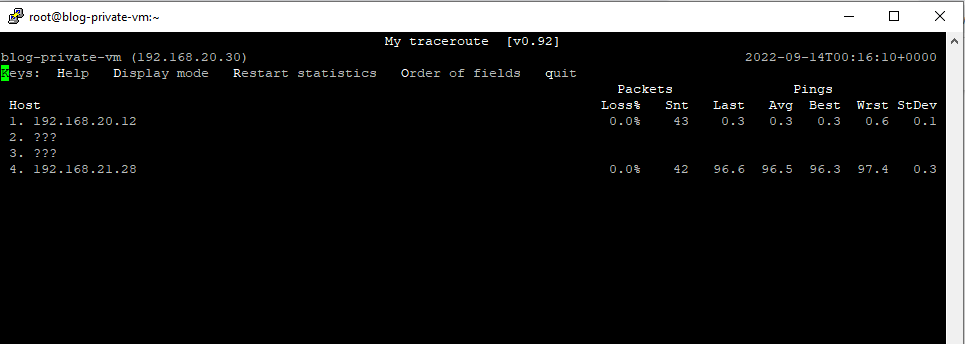
Traceroute result from both sides of private VMS.
Note: The first hop in the below screenshot (the IP address starts with 140.91.x.x) is DRG public IP.
[root@test ~]# mtr 192.168.20.30
[root@blog-private-vm ~]# mtr -n 192.168.21.28
Conclusion
OCI site-to-site VPN provides a reliable and performant IPSec connection between your on-premises network (in our case Libreswan) and your virtual cloud network (VCN).
You can use the OCI VPN service for many use-cases like securely connecting to OCI, connect multiple locations to the OCI, connect to other Cloud Service Providers (CSPs), and building redundant connectivity for OCI FastConnect. For more information regarding the OCI VPN, please check the link below.
Site-to-Site VPN Overview (oracle.com)
I hope you enjoyed it!